Giselle Onofre
Plant Stand
Furniture Design Summer 2021

Skills: Woodworking - Table Saw, Drill Press, Belt Sander, Miter Saw

With the COVID pandemic raging on, I was spending a lot more time indoors than I would have preferred. I was desperate for a new hobby. And in classic Gen Z fashion, I jumped on the houseplant craze with no plans of stopping. Pretty soon I had too many plants and not enough well-lit shelves to fit them on. It became clear to me that I needed a dedicated plant area in my living room to firstly hold all my plant care tools, and secondly to proudly display my plants like a parent posting about their child on Facebook. There were many worthwhile options listed on Amazon with free 2 day shipping but I was also extremely bored and knew I could easily build one myself with the right tools. And so I did! My requirements were as follows:
  • A three tier plant stand with an adjustable hanging rod
  • Shelves shall allow sunlight through to the lower shelves
  • The second tier shall be at the same level as my living room window sill
Plant Stand Model
Manual
Cut List
OnShape Modeling and Drawings
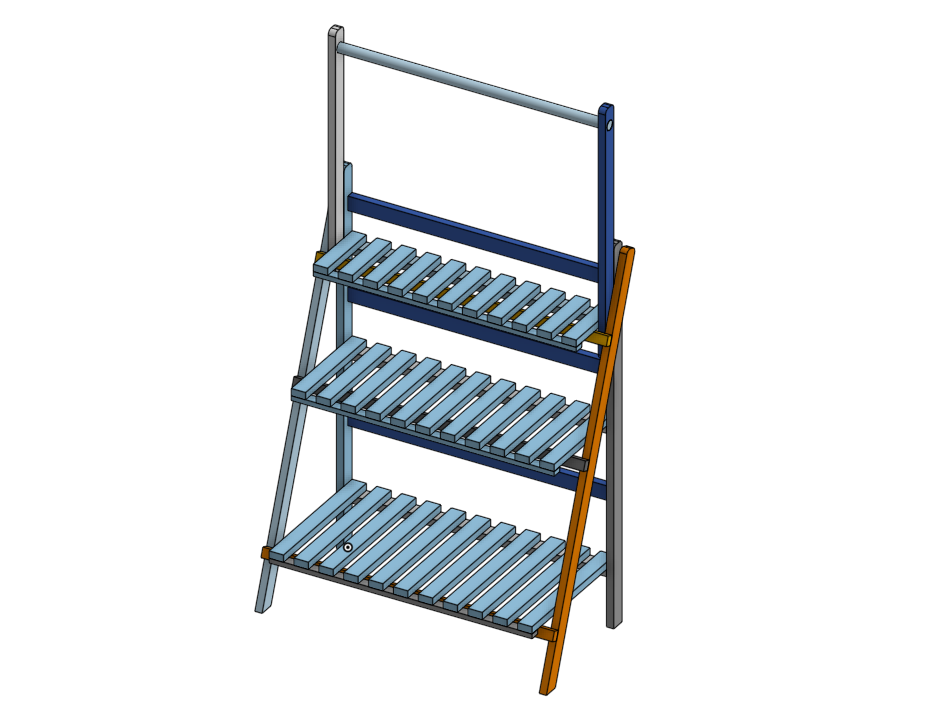
Before working on my plant stand in a wood shop, I wanted to model it using the free software OnShape. This gave me the flexibility of redesigning the parts of my plant stand as well as 
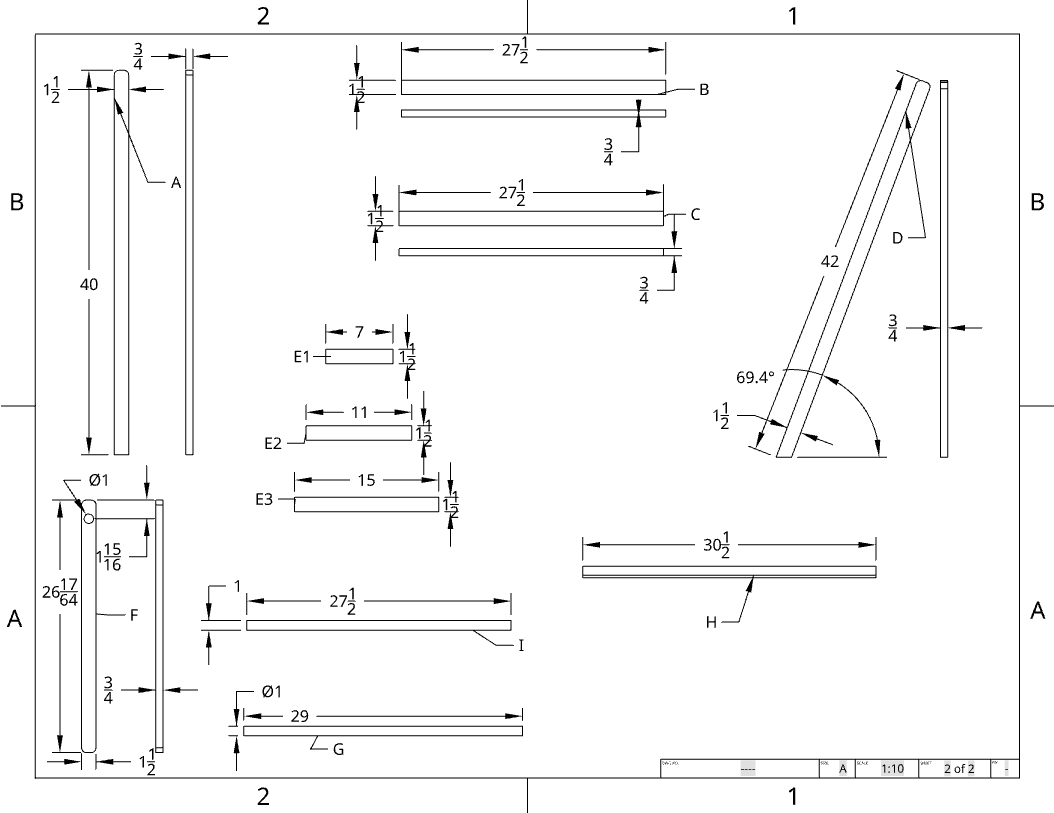
the ability to generate dimensioned drawings to reference when machining. I was also able to 
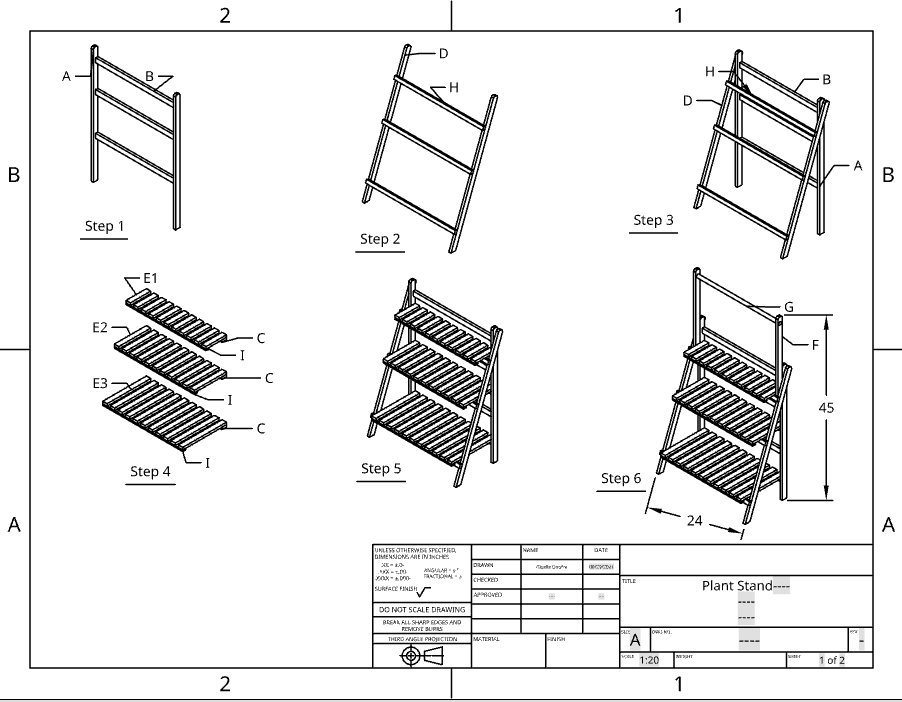
create a simple assembly guide to follow once I finished cutting and sanding all my pieces.
Finished Plant Stand
Building and Assembly
For my plant stand, I chose a long stock piece of poplar wood due to its medium density and sturdy quality. I used a miter saw to cut the rough lengths of each part. After that, I switched to the table saw to cut the parts to their exact lengths. My plant stand had many repeating parts, so I used this to my advantage by focusing on making many instances of the same part in the same session. This meant I could quickly make all the slats and beams without having to readjust the table saw. For the curved beams, I traced a symmetrical curve onto the top of one of the beams, taped the pieces together, and used a belt sander to get the same curve across all the beams. I used a drill press to drill holes in their correct position, and used a hole saw to drill out a 1 inch hole for a dowel rod. The slats were evenly spaced using a custom wood spacer I made. I temporarily glued on the slats before permanently nailing them in with a nail gun. The result is a fully functioning plant stand with plenty of space for all future impulse plant purchases!