Giselle Onofre
Ball and Beam
System Dynamics and Control Spring 2020

Skills: Mechanical Design, CAD Modeling, Programming, Laser Cutting, 3D Printing, Waterjet Fabrication

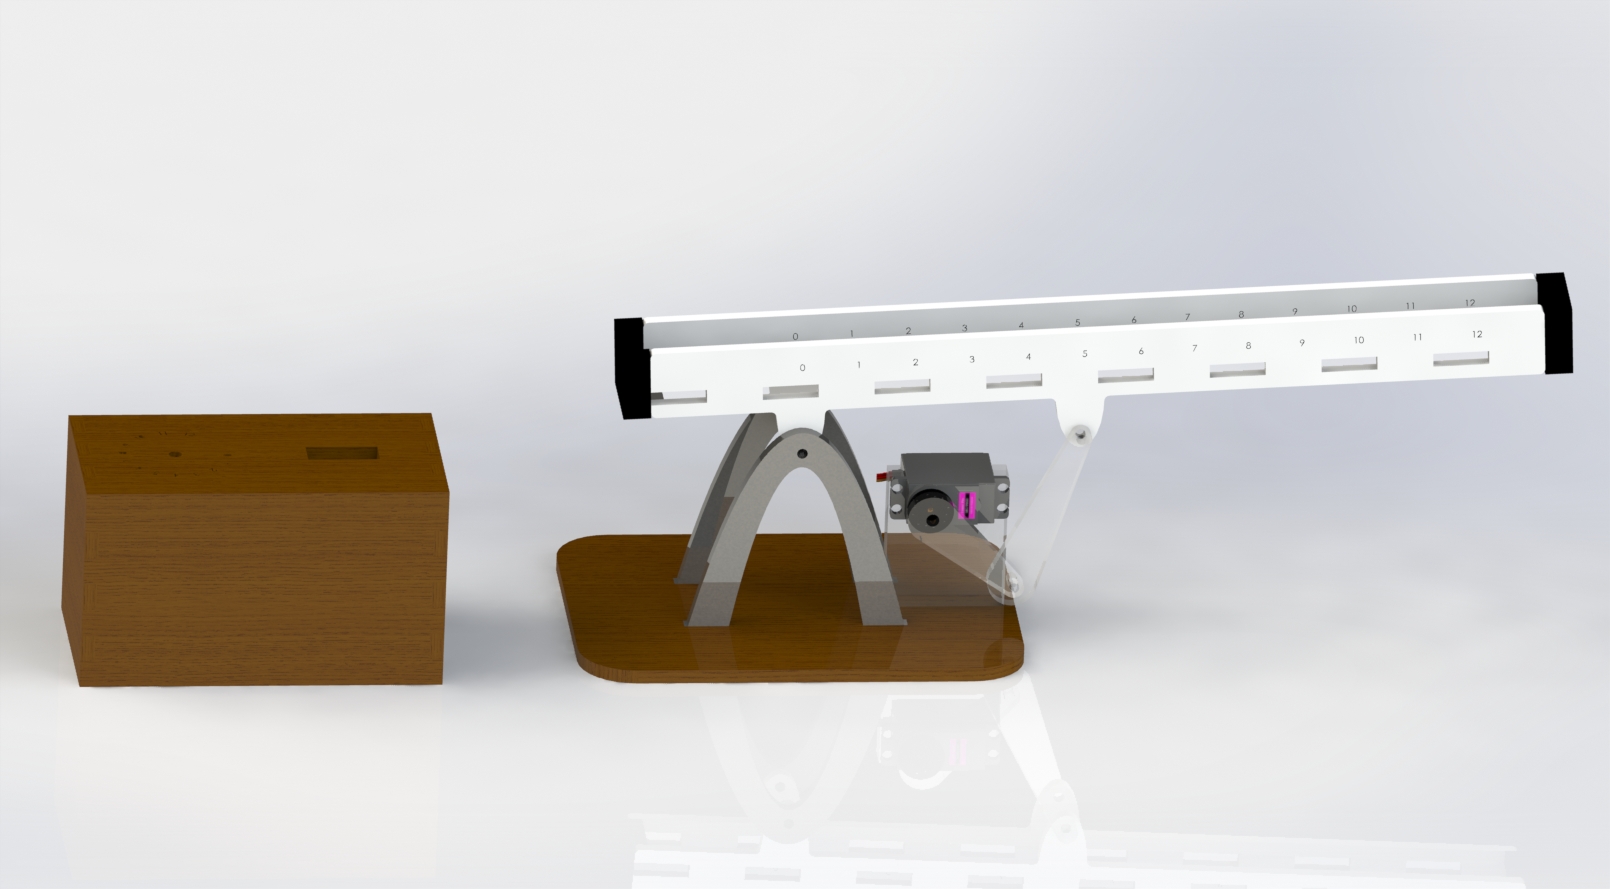
At Rowan University, to gain a greater understanding of feedback loops and PID control, I created a traditional ball and beam 
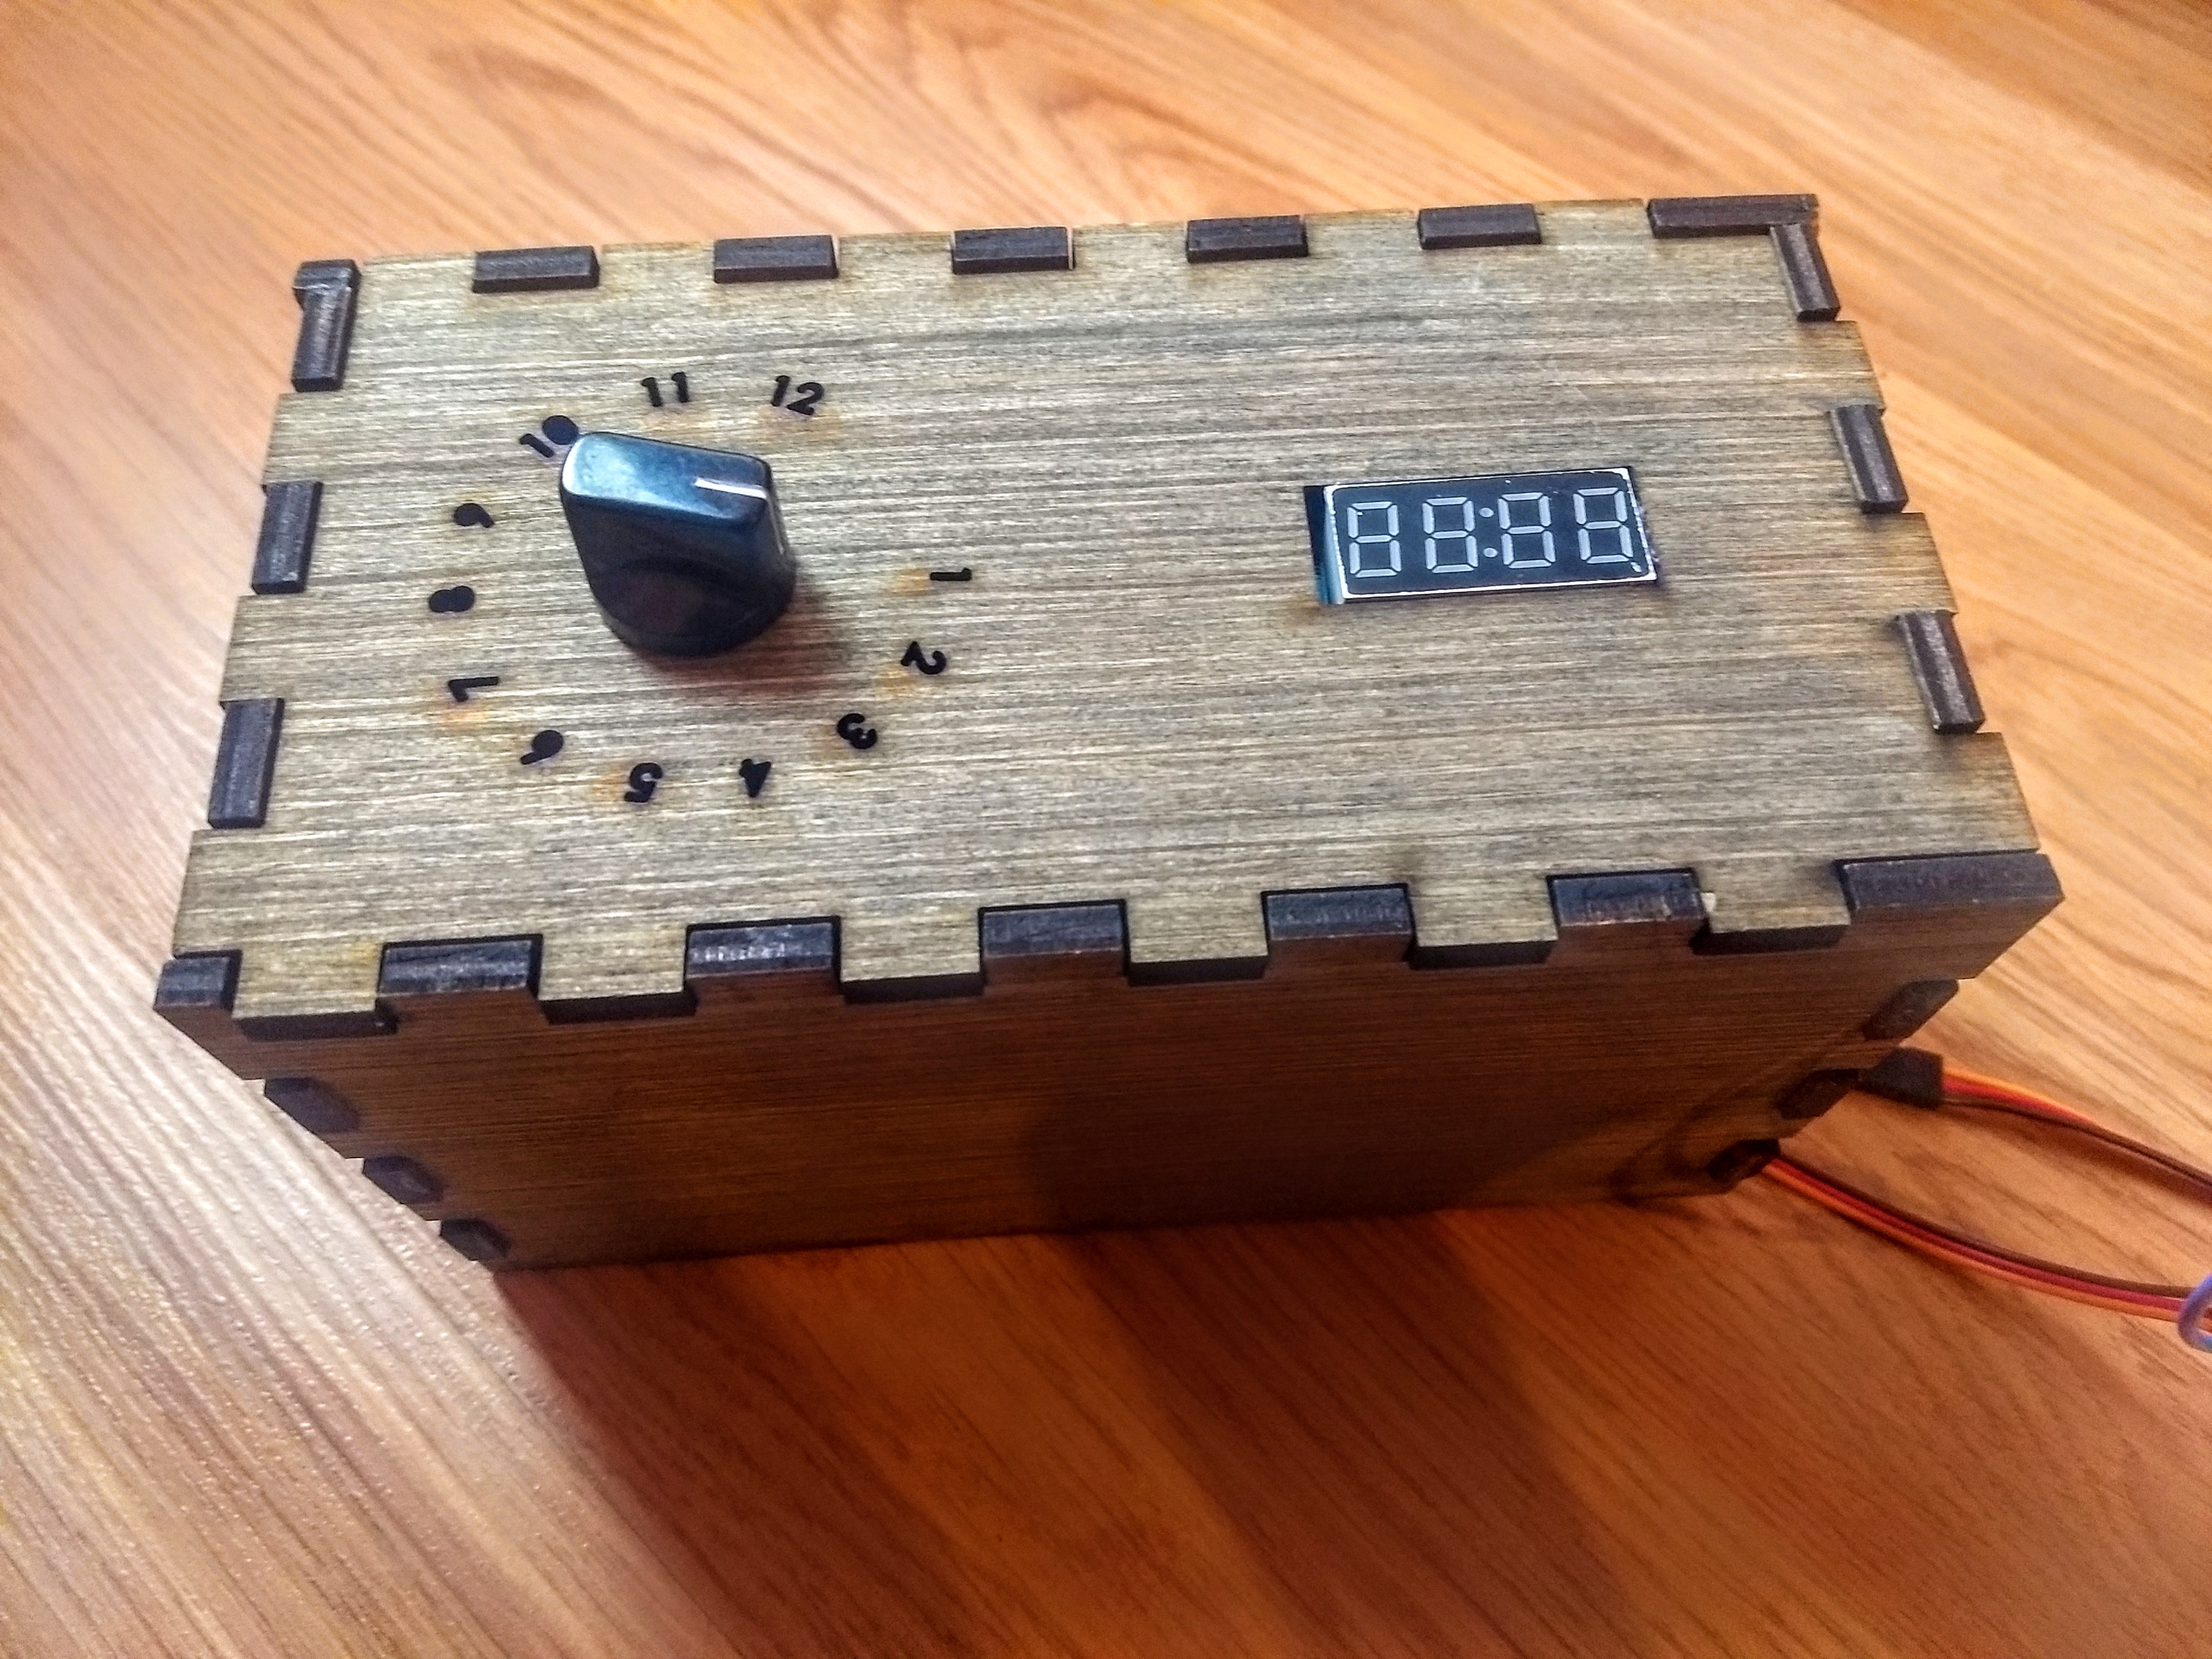
system. The ball and beam system I developed consisted of a dial box enclosure with a 4 digit display to control the location 
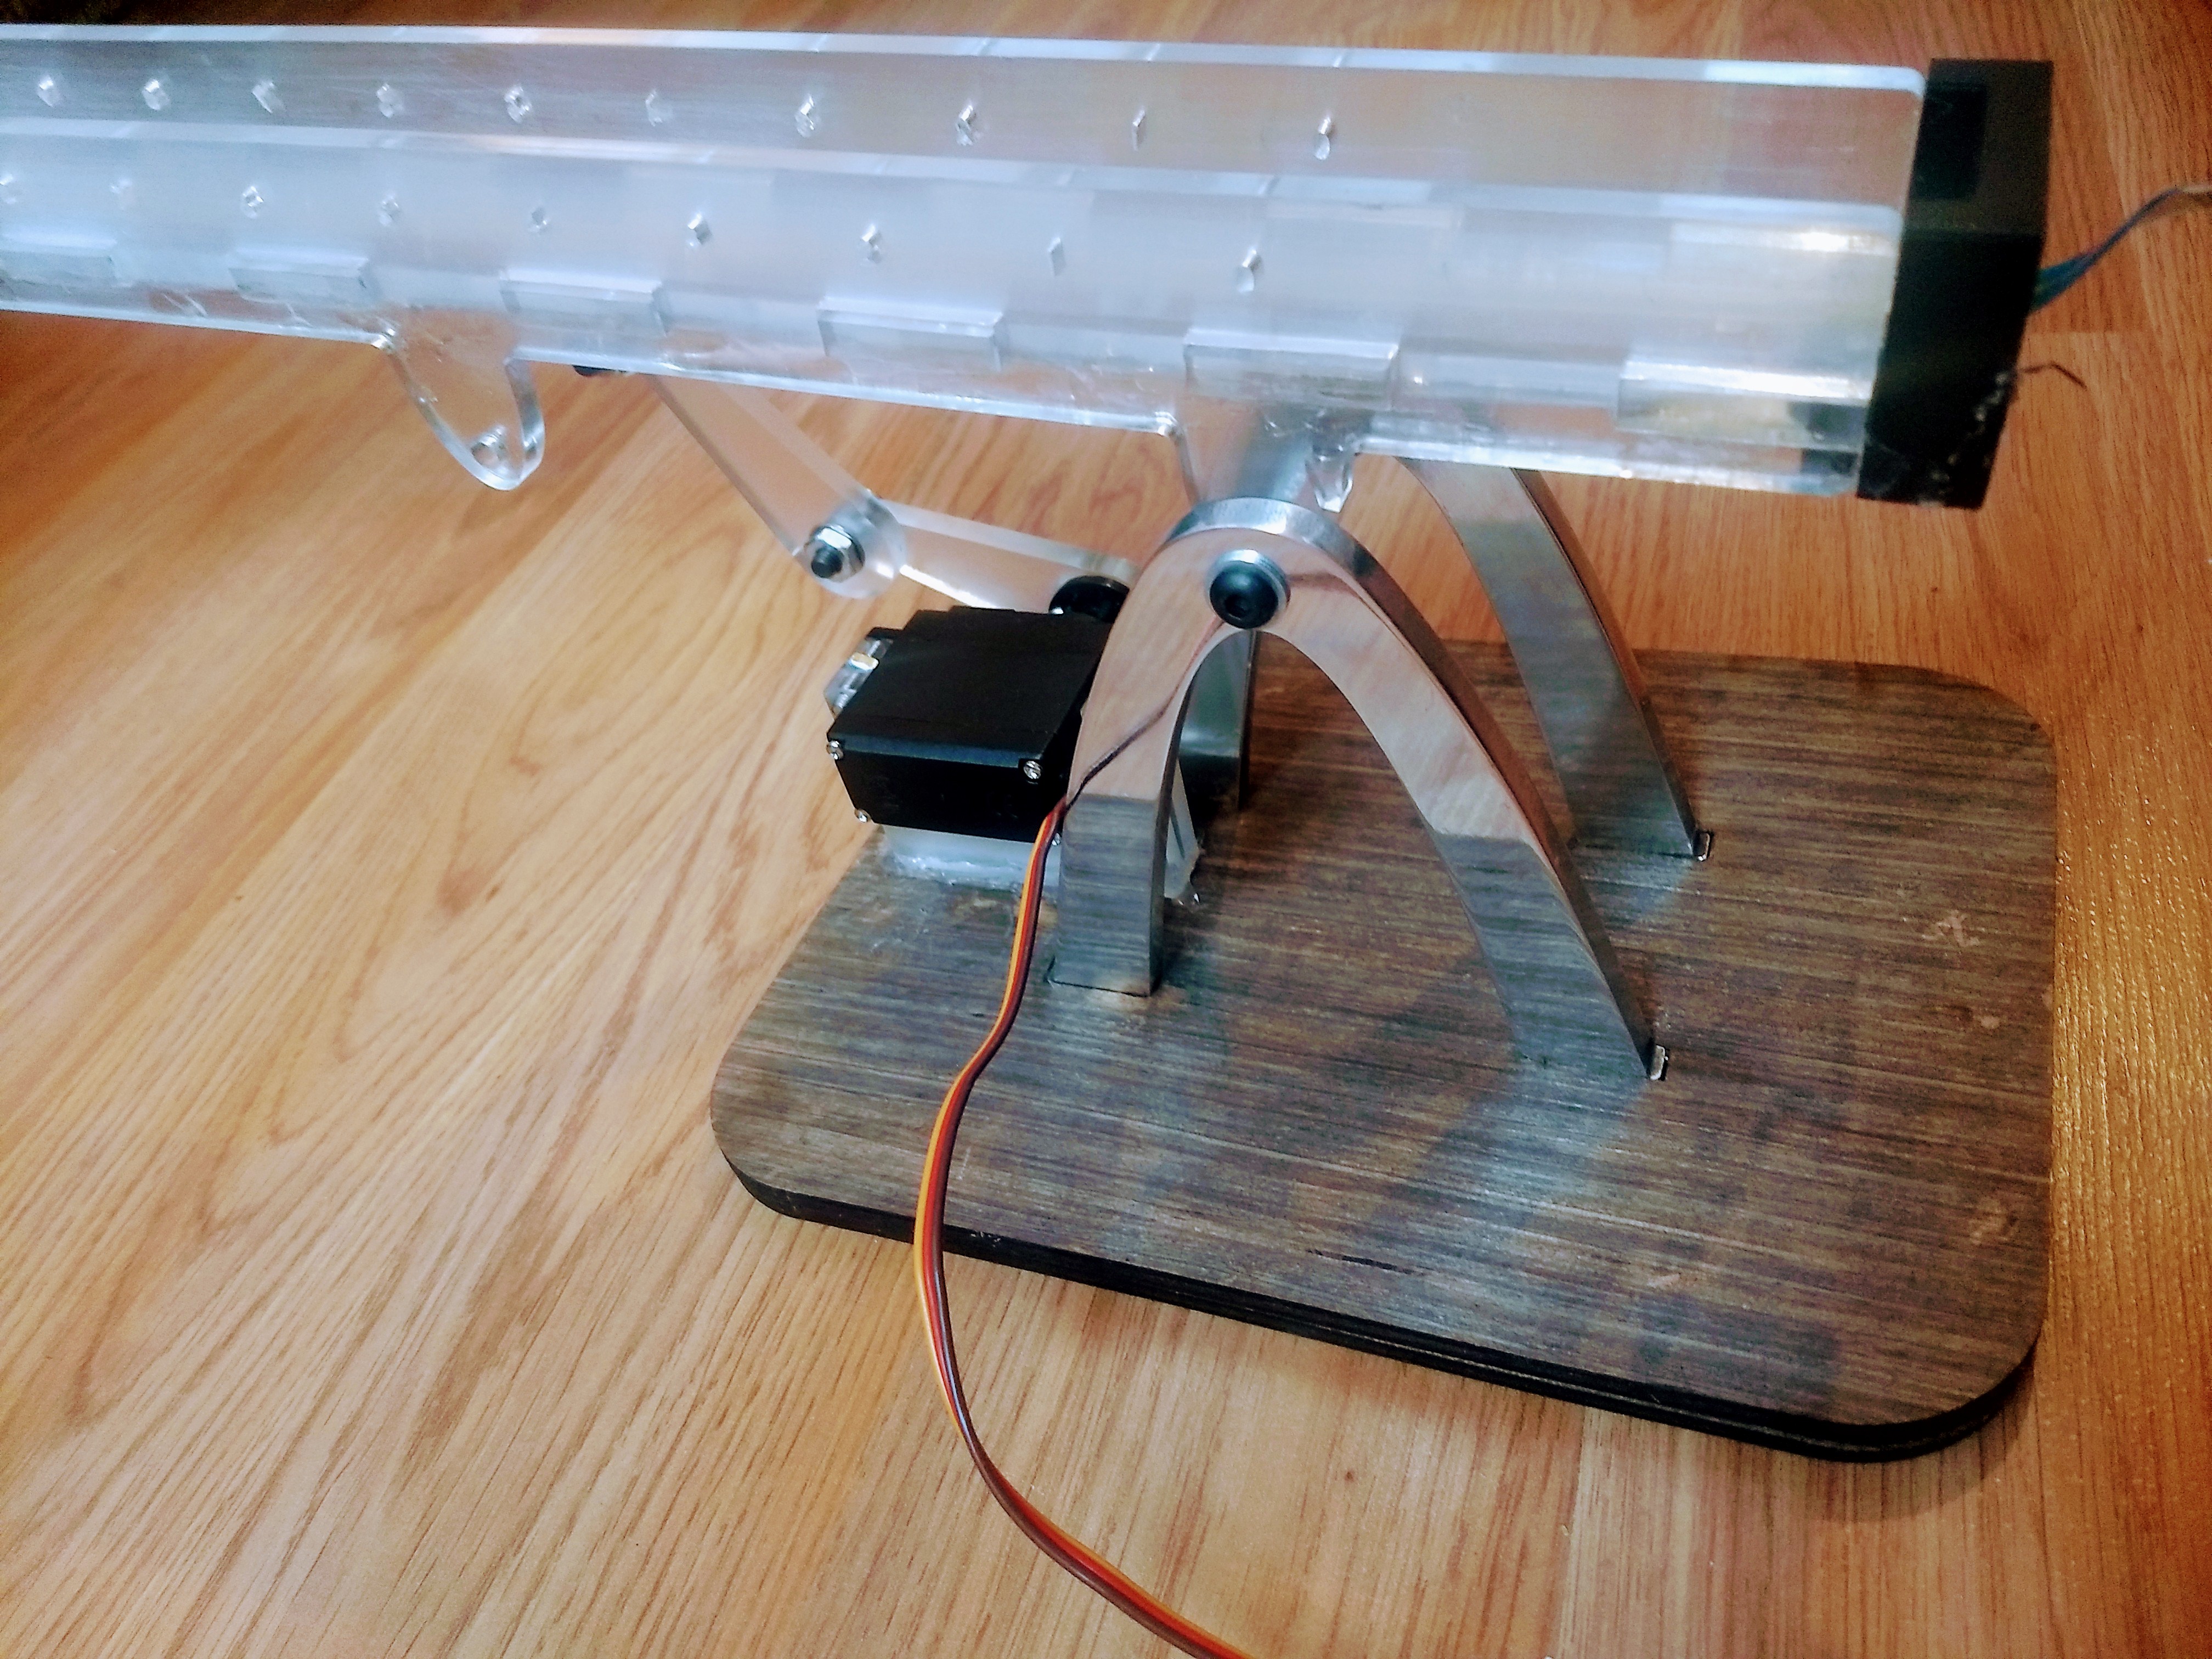
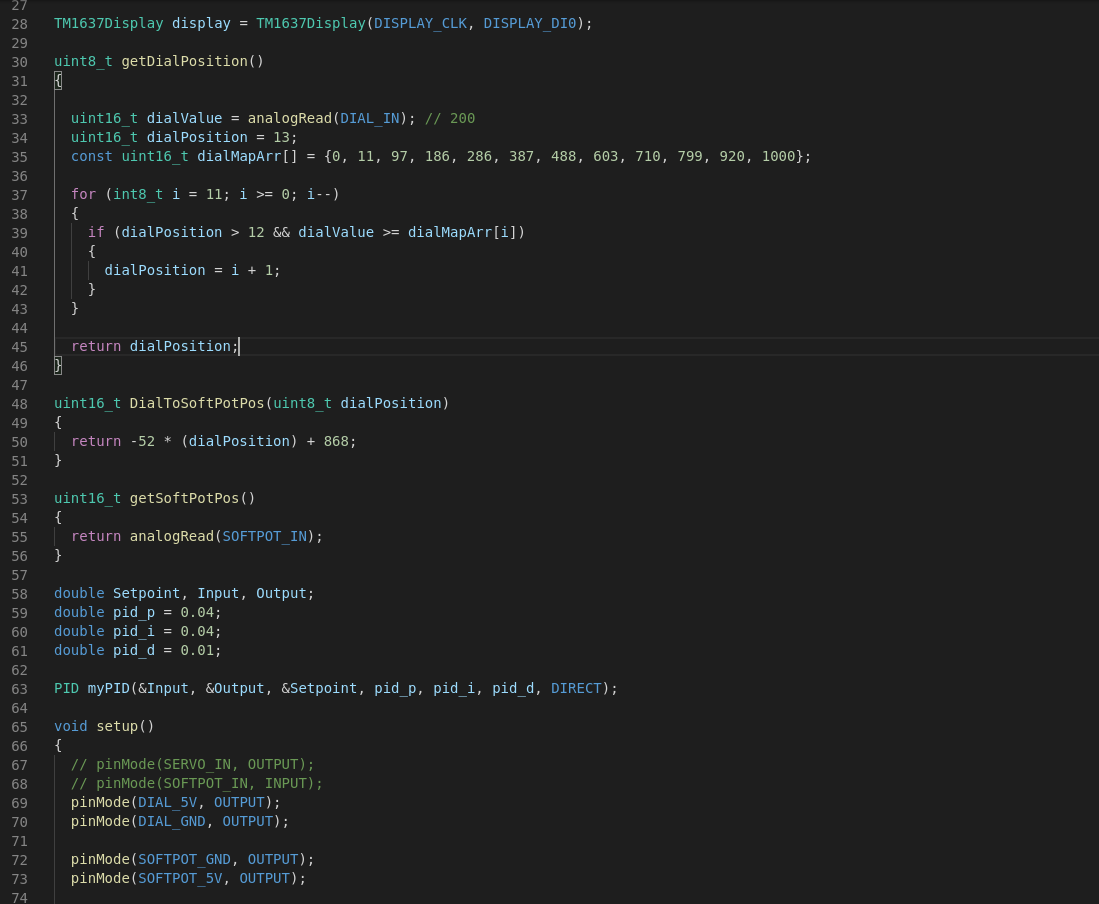
of the ball along the beam. The ball's location on the beam was measured using a flexible, soft potentiometer sensor, and the ball was moved using a three-bar linkage controlled by a servo motor actuator. Despite COVID-19 closing down my university's facilities and resources, I was able rapidly model and fabricate the final parts of my project and complete the programming portion from my home. Overall, this project grew my skills in circuitry, programming, and product design.
Flower Render
SolidWorks Modeling & Assembly
The design was intended to look like a finalized product. To achieve this goal, an enclosure was designed in SolidWorks with engraved dial markings for the user to choose their intended position on the beam. Likewise, the beam was designed with engraved markings corresponding to the dial positions. To mount the beam, two arcs inspired by the Gateway Arch in St. Louis were created. And to prevent the 1.25 kg steel ball from rolling off the beam, two custom ball stop ends were designed to fit into the beam.
Dial Box
Arcs
Fabrication
The dial enclosure and base plate was fabricated using plywood material on a lasercutter and stained with an ebony wood finish. The arcs were fabricated on a CNC waterjet and I gave it a polished finish using a polishing wheel. The beam was fabricated using acrylic material on a laser cutter as well. Given the ball's weight and the force it exerted on the ends of the beam during PID tuning, the ball stop was fabricated using PLA material on an FDM 3D printer in order to enhance its durability.
Ball and Beam Code
Programming
This project allowed me to apply my programming knowledge in an entirely new way. The ball and beam was powered using a simple Arduino but I decided to use my extra time in quarantine to expand my programming knowledge. Arduino IDE has never been my favorite development environment, so in my search I found that VS Code's Platform IO extension gave all the benefits of a color coded development environment with easy to use search features that also supported uploading and monitoring to the Arduino board. I did my best to keep memory usage on the Arduino low in order for the PID function to work at optimal speeds to reach the desired setpoint on the beam. This gave me a broader view on the different types of ints and the importance of memory allocation in code. The PID library in Arduino I used(credit to Brett Beaureguard) didn't allow me to tune my PID values as the ball and beam was functioning. To avoid the slow process, of changing PID values everytime I had to upload and monitor, I programmed a void readString loop to read the type of control i.e. P, I, or D, and the value. Using the serial plotter in Arduino IDE, I was able to see in real time the time it took for the ball to reach the position, oscillations, and steady state error. Thus allowing me to tune my ball and beam effectively.